Walkthrough
Preparing your model in a specific way is what powers the configurator. The script converts your standard materials to pbr shaders (as good as it can). After that it builds a mini webpage with the sketchfab model embedded and a menu to configure the materials.
Let’s follow along with an example. I’m using the Taksi model made by erbaycelik. You can download it yourself and try it out.

The scene I’m working with
Body color
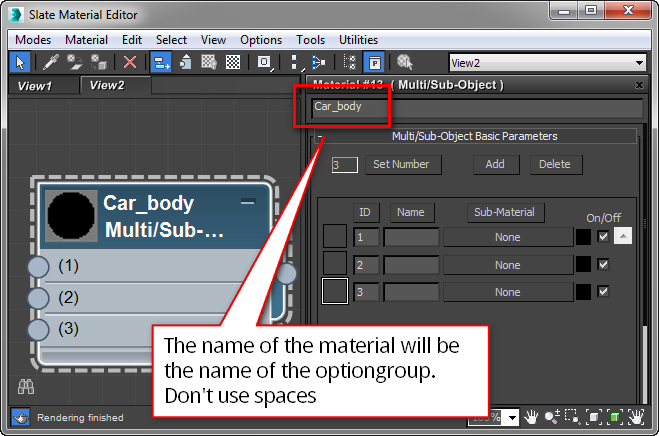
I have a car and I want to configure the main body color of the car. First, make sure the mesh doesn’t have multiple material ID’s. Split the mesh into separate objects if that’s the case. After that, create a multi/subobject material and call it “Ca body”. This material represents an optiongroup.
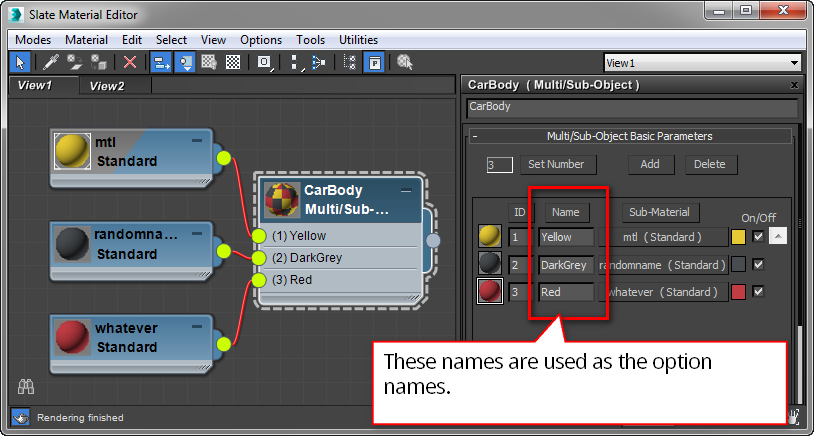
I want to have three body colors: yellow, dark grey and red. Create a standard material for each of these colors and add them to the Car body material. The material you put in slot 1 will be the default material. The other materials will be the options you can choose from. Add names for each of these materials in the Car body material. Each submaterial represents an option.
Note
To avoid issues in the configurator only use alphanumeric characters for the material names. You can use spaces if you want.
Create a new multi/sub material
Add submaterials and name them properly
In this example I have one optiongroup with three options. Add materials to the rest of the scene. Make sure to avoid other multi/sub materials as the exporter will interpret them as optiongroups.
Publish model
Now we’re actually done and we can publish the scene. Select the objects you want to publish and press the big button.
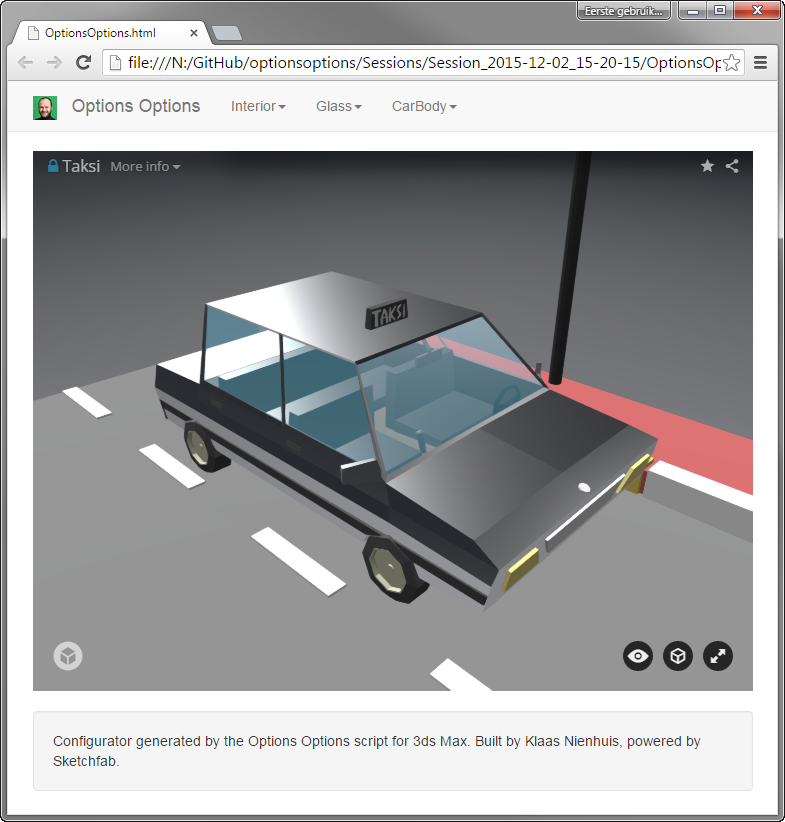
Open the configurator with the Open configurator button. You can see a single optiongroup in the navigation bar called Car body. It contains three options, one for each submaterial.
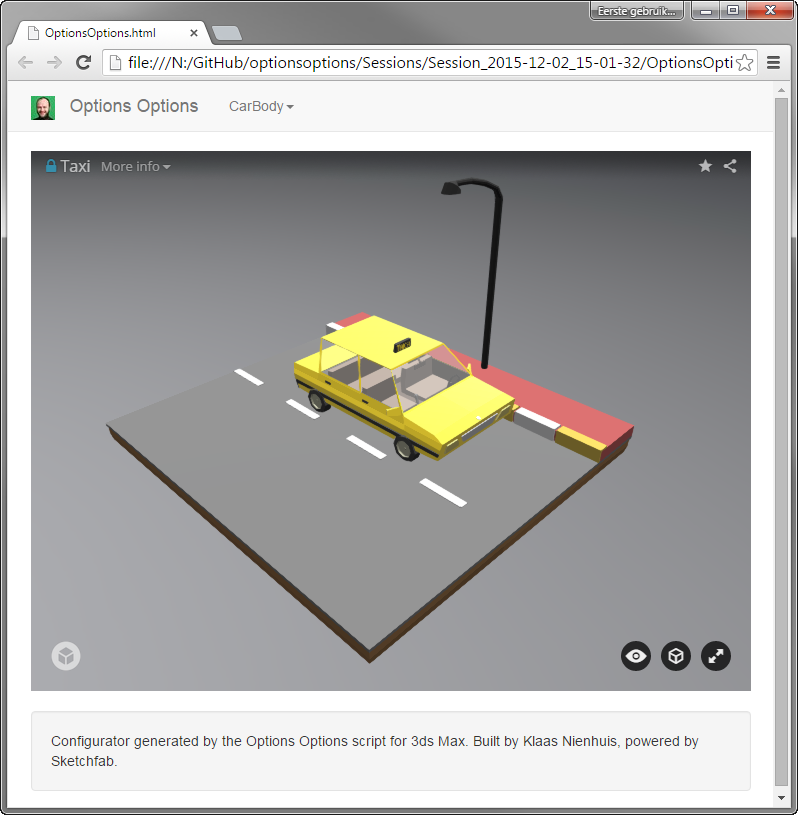
This is the configurator with one optiongroup at the top
Glass and Interior
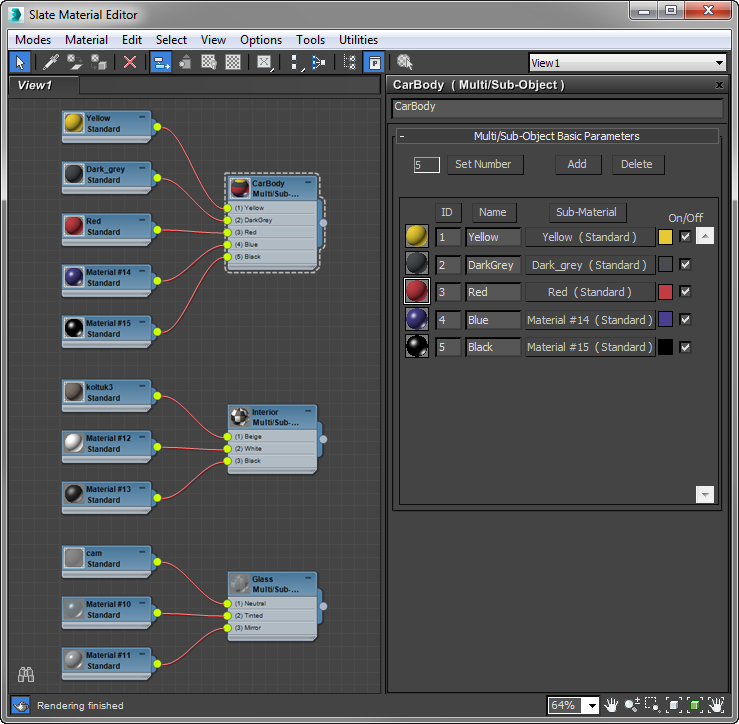
Let’s step it up and add two more optiongroups. I’d like to configure the glass and the interior. For each optiongroup I add another multi/subobject material and add some submaterials to it. Make sure to properly name the materials.
Adding more * ``optiongroups`` * and options
Each multi/sub material becomes an optiongroup